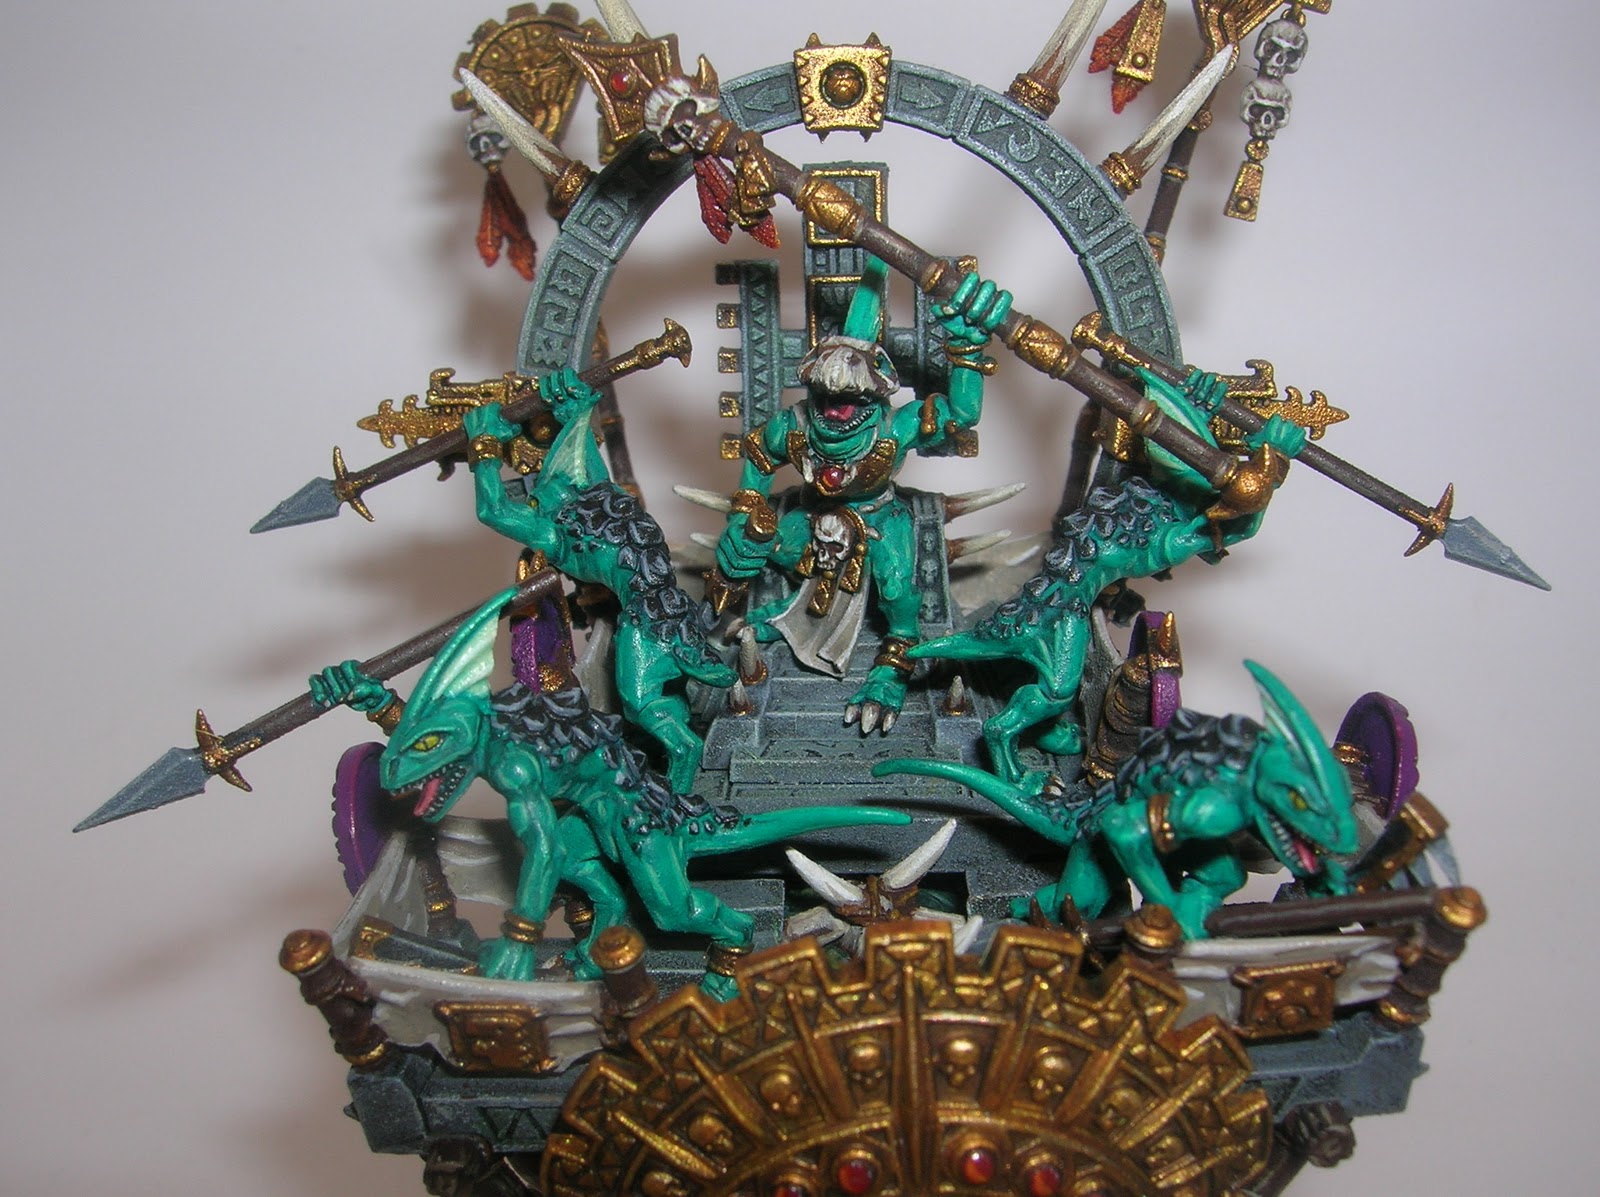
A semicolon in a post title, edgy. Finally finished a unit filler that I started a horribly long time ago, but only now had the time to finish because everyone at the one inch warriors home base has been ill with a stomach flu, which wreaked havoc amongst social calendars but generated hobby time/baseball postseason viewing opportunities.
I also finished an odd Kroxigor I had lying around, which subsequently spurred me on to start the tedious project of re-basing the older units in my army. I originally based the lizards in a horribly dark scheme topped off with some flat looking flock. In redoing the Krox's I added some 5th Edition Chaos Warrior debris in Khorne colors to round out the color scheme on the unit.
Finally, I also painted up a standard bearer for the unit. The sword is from the Cold One Cavalry kit.
Showing posts with label Lizardmen. Show all posts
Wednesday, October 10, 2012
Thursday, August 30, 2012
Unit Filler #2 - Appeasing the Lizard Gods
One of my ongoing Lizardmen projects has been building unit fillers for my Saurus regiments. One of my ideas was to construct a small statue of an ancient, long dead lizard god festooned with trophies taken from the fallen enemies of the Old Ones. After sketching a few designs, I realized the best way to make the idea come to life was to sculpt the statue out of Sculpey clay. I have no sculpting skills, which is apparent from my first attempt, as seen on the left in the photo. The thing came out looking bloated and lethargic, lacking the vengeful, cold-bloodedness that I wanted to evoke. It's also too large and looks like a fifth grader made it. I was going for an ancient, crude stone statue, but yuck. Attempt number two on the right came out better, but there's still a few spots that will need to be cleaned up.
After it's mounted on a 50 mm base the plan is sculpt some jungle vines creeping up the sides with green stuff and pile up skulls, severed heads and helmets around it, in homage to some unnamed, angry serpent deity. Then, I'll model some Saurus warriors presenting their latest offering to the gods.
Labels:
Lizardmen,
painting and modeling
Wednesday, July 4, 2012
Slann & Temple Guard Family Portrait
If you're gonna put down a unit that costs 700+ points, you want it to look good. I'm fully anticipating that in the next game I play with these guys, freshly-painted-model-syndrome will kick in and they will die a horrible, agonizing death.
Labels:
Lizardmen,
painting and modeling
Saturday, June 16, 2012
And now more Temple Guard
See, hockey playoffs end and I get back to painting minis. I normally love combining two of my favorite pastimes by painting minis and watching sports simultaneously (usually a third pastime, drinking beer, gets involved) but NHL playoffs are too intense and there would be an extreme risk of me knocking paints and figures everywhere when something exciting happens like Kopitar or Carter score gaming winning overtime goals in the first two games of the Stanley Cup finals.
Moving on... I finished off the last eight models so all that's left to do is base the entire regiment and then go through everyone for touch-ups. Once that's done it'll be time for glamor shots with the hypno-toad.
Labels:
Lizardmen,
painting and modeling
Sunday, April 15, 2012
Albino Saurus Hero Finished
Managed to sit down an wrap up this model over the weekend:
The only thing interesting about the final steps on this guy was that I played around with Lahmian Medium to make a few glazes and washes. It pretty much works as advertised so I won't pontificate on it. This stuff would have been nice to have when I did the washes on the skin since my usual soap + water + paint technique didn't give me the results it normally does. If you look closely enough you can spot the areas around the lower legs and feet that didn't turn out that great and which I was too lazy to re-paint. Despite that, I'm happy with the figure.
Sunday, March 25, 2012
Albino Suarus WIP Part 2 - Painting Gold
The next step in my little painting experiment is trying a new technique for gold. I encourage you to read Luaby's post on this technique since he's far more knowledgeable about these matters than I am. For those of you too lazy to click the link here's the gist of what I'm going for: gold paint in general stinks because it lacks opacity and thus does not provide good coverage, but you can cheat and mix it with brown paint (good opacity!) and layer up to straight gold paint. I've seen this done in White Dwarf painting tutorials, but they never explain it properly. They also leave out a key point that Lauby brings up: you need to properly match the brown you mix in with your gold - i.e. a yellowish brown for a yellowish gold. If you're new to that idea, go do some reading on color theory at The Back 40k, it'll blow your mind.
Back to my Saurus. For my Lizardmen army I usually paint gold by putting down a layer of Cathal Brown foundation paint for an undercoat, base coat with Shining Gold, wash with Devlan Mud, highlight with Burnished Gold and then glaze with Dark Angels Green for a tarnished look (I know these colors are now obsolete, go look up the conversion chart if you must). This recipe is based around Shining Gold, so I used this as the base to mix a brown into. Consulting SandWyrm's super awesome color wheel, I reasoned that Shining Gold seems to have a good deal of orange in it and thus Bestial Brown would be a good match. I used a 1/1 mix, with a spot of Scorched Brown added to darken the color. Scorched Brown has a lot of red in it, but I didn't want to use straight black and end up over desaturating the hue of the gold.
The next step was to wash everything with Devlan Mud and then layer on a roughly 3/1 mix of gold and brown. Now there's enough base color on the model to paint on layer of straight gold without it going on streaky:
Back to my Saurus. For my Lizardmen army I usually paint gold by putting down a layer of Cathal Brown foundation paint for an undercoat, base coat with Shining Gold, wash with Devlan Mud, highlight with Burnished Gold and then glaze with Dark Angels Green for a tarnished look (I know these colors are now obsolete, go look up the conversion chart if you must). This recipe is based around Shining Gold, so I used this as the base to mix a brown into. Consulting SandWyrm's super awesome color wheel, I reasoned that Shining Gold seems to have a good deal of orange in it and thus Bestial Brown would be a good match. I used a 1/1 mix, with a spot of Scorched Brown added to darken the color. Scorched Brown has a lot of red in it, but I didn't want to use straight black and end up over desaturating the hue of the gold.
The next step was to wash everything with Devlan Mud and then layer on a roughly 3/1 mix of gold and brown. Now there's enough base color on the model to paint on layer of straight gold without it going on streaky:
Monday, March 19, 2012
Albino Saurus Lord WIP & New Paint Brush Review
One of the casualties of last year's hobby-hiatus was the plastic Saurus hero that I bought to experiment on with some new (to me) painting techniques. Armed with my new Winsor & Newton Series 7's and needing a break from painting Temple Guard, it was time to get back to work on the Saurus hero.
One of the things I wanted to try with this model is a method for painting a "cool" black and white using turquoise to shade and highlight the colors. I based my recipes from two BoLS tutorials (here's a link to the black and the white). As these call for some P3 colors, I modified them so I only have to use my GW paints.
The Saurus is going to have albino skin with black scales. The turquoise should tie him in with the rest of my army, which is painted with the now OOP Scaly Green. If you know your Lizardmen fluff, this means he's marked for greatness by the Old Ones! Since the bulk of the model is going to be white, I started with a light gray undercoat (another first for me). I then built up the albino skin with the following:
1. Base coat with white mixed with a small amount of Hawk Turquoise and Fortress Gray. You know you're in the ballpark when you look at the color and think "minty fresh toothpaste."
2. Wash the area with Hawk Turquoise.
3. Apply a wash of Hawk Turquoise mixed with black into the deepest recesses.
4. Going back to the base color, start adding highlights. Then mix in white for the next layer and use pure white for the final highlights.
One of the things I wanted to try with this model is a method for painting a "cool" black and white using turquoise to shade and highlight the colors. I based my recipes from two BoLS tutorials (here's a link to the black and the white). As these call for some P3 colors, I modified them so I only have to use my GW paints.
The Saurus is going to have albino skin with black scales. The turquoise should tie him in with the rest of my army, which is painted with the now OOP Scaly Green. If you know your Lizardmen fluff, this means he's marked for greatness by the Old Ones! Since the bulk of the model is going to be white, I started with a light gray undercoat (another first for me). I then built up the albino skin with the following:
1. Base coat with white mixed with a small amount of Hawk Turquoise and Fortress Gray. You know you're in the ballpark when you look at the color and think "minty fresh toothpaste."
2. Wash the area with Hawk Turquoise.
3. Apply a wash of Hawk Turquoise mixed with black into the deepest recesses.
4. Going back to the base color, start adding highlights. Then mix in white for the next layer and use pure white for the final highlights.
![]() |
| (Sorry for the poor photo, I'm still learning to use my new camera) |
Saturday, March 17, 2012
More Temple Gaurd Finished and New Brushes
Over the past week I put the final details on eight more Temple Guard, including the command group. Eight more of these guys to go, and the whole unit will be done.
I might need a break before moving on to the final eight models. Temple Guard are time consuming due to their level of detail. From start to finish, this is what needs to be painted: green skin, black scales, stone details on the halberds, gold, bone/skulls, wooden weapon shafts, cloth straps/wrappings, gems, eyes, shields and the occasional shrunken head. The skin and scales aren't too hard since they were dry brushed, but all those damn intricate details made me go cross-eyed a couple of times. They still need to be based, but that can wait until the whole unit is ready to go.
Labels:
Lizardmen,
painting and modeling
Thursday, February 16, 2012
A Note on Painting Wooden Weapon Shafts
I've always been a bit beguiled when it comes to painting weapon shafts - you know, spears, flails, etc. It's easy to do a simple highlight but with that large amount of blank, cylindrical space, I always felt that a wood grain texture gives the model more life. The problem I've had is finding a way to paint such for a 20+ figure unit in way that looks good and is efficient - the latter of which is always a constant struggle for me. I've tried something before with my Saurus Calvary, but it was too tedious and I wasn't terribly excited about the results.
I had one of those lovely Eureka moments while reading a recent post on Dave Taylor's blog - who is a much more prolific painter and blogger than I. There's a nice close up one of Dave's Empire Flagellants, who's wielding a flail with a dinged up wooden shaft. With that close up, I was able to break down Dave's technique and realize that this is the solution I'd been looking for.
After making some crude post-it diagrams breaking down the necessary steps (my best thinking is usually transcribed on these yellow squares), I grabbed a few Temple Guard and went to work:
I had one of those lovely Eureka moments while reading a recent post on Dave Taylor's blog - who is a much more prolific painter and blogger than I. There's a nice close up one of Dave's Empire Flagellants, who's wielding a flail with a dinged up wooden shaft. With that close up, I was able to break down Dave's technique and realize that this is the solution I'd been looking for.
After making some crude post-it diagrams breaking down the necessary steps (my best thinking is usually transcribed on these yellow squares), I grabbed a few Temple Guard and went to work:
Labels:
Lizardmen,
painting and modeling
Sunday, January 22, 2012
Where the *bleep* did one inch warriors go?
What MacArthur said about old soldiers is also true about blogs - they don't die, they just slowly fade away. For a while I was content to let one inch warriors fade away into the depths of the blog rolls, never to see site traffic again... although apparently I've still been getting tons of hits from bizarre Google searches, but that's probably a result of the images I've poached to spice up my posts. Alas, having spent months away from blogging, painting and gaming altogether has renewed my spirits and instilled a new, yet slightly tempered yearning for hobby action. I also have a bunch of half-finished posts that if left uncompleted would make me feel criminal for the deprivation inflicted upon my (hopefully) loyal readers.
Right before my on-again-off-again hobby odyssey was put on a self-inflicted temporary hiatus, I had agreed to help best-warhammer-buddy Justin work on his then new and shinny Dreadfleet box. Unfortunately that didn't get too far due to a multiple fatality car accident that kept him stuck in traffic on the freeway for most of the day that we were planning on using to assemble and paint the games pieces. With the little time we had, we got things built (those boats were challenge) and primed... and then decided to go drink beer with our old college buddies! I did manage to get one ship painted a few days later:
![]() |
| Need a seafaring vessel - why not Zoidberg? |
Labels:
blogging,
Dreadfleet,
Lizardmen,
painting and modeling,
photography
Monday, September 12, 2011
Saurus Unit Filler WIP & Other Odds and Ends
I like to be frugal, whether I'm shopping for groceries, pet supplies or hobby goodies. This is why unit fillers in WFB appeals to me. My two Saurus units presently have 20 models each, but I want to expand the units up to 24. Inexpensive solution, take the 8 unpainted models I have and turn them into unit fillers. After sketching out some crude diagrams on post-it notes, I've assembled the first one.
Labels:
Lizardmen,
painting and modeling,
product review,
rants
Thursday, August 25, 2011
New Plastic Saurus Hero Picture
I'm usually not in the business of posting about new and upcoming releases (yes, I did it for the Tomb Kings, but that was to prove a point about the direction 8th edition is going) but for the first time in a long time, we're getting a new Lizardmen model:
The new plastic characters that we've been seeing over the past few months are very exciting, even if they lack any options. I like this guy as he fits in with the style of the army without looking like a re-sculpted Temple Guard model. I've been wanting to paint an albino Lizardmen hero for some time now, so this model will be the perfect opportunity.
According to BoLS, this will be released mid-September for $13.25.
![]() |
| Courtesy of BoLS |
The new plastic characters that we've been seeing over the past few months are very exciting, even if they lack any options. I like this guy as he fits in with the style of the army without looking like a re-sculpted Temple Guard model. I've been wanting to paint an albino Lizardmen hero for some time now, so this model will be the perfect opportunity.
According to BoLS, this will be released mid-September for $13.25.
Labels:
Lizardmen
Wednesday, June 8, 2011
Salamanders and Stuff
... the kind that spit fire, for Lizardmen, not the green-armored space-dudes. I had to explain this to several GW staffers when I was trying to find these models. No, I'm not looking for Forge World Rhino doors, dammit. Anyways...
These were a fairly straightforward paint job. The tough part was that there is not much space between the Salamanders' underside and the base, making it difficult to get a brush in there to paint the undercarriage. I'll base them up later when I paint the Skink handlers.
Labels:
blogging,
Lizardmen,
music,
painting and modeling
Monday, April 4, 2011
Tuesday, March 15, 2011
New Goblins and Hipster Toad Tries a New Magic Lore
Today's post is a 2-for-1 special. I recently got a game in with my lizards against my regular opponent and his night goblin army, using their new army book for the first time. I've played several games against goblins recently so I'll share my thoughts on how they perform under their new book versus the old. I've also made a few promises online that I'd break form from the rather predictable choice of running my Slann with Lore of Life and try what is generally considered their second best magical option, Light.
First, because it's most relevant, I'll talk about the new Gobbos. I didn't get the chance to really read through the new book, so the following is more a series of educated observations rather than serious analysis. The army I faced consisted primarily of night goblins units, all packing fanatics, with a supporting cast of trolls, two giants and bolt throwers. If you're going field night goblins, all or nothing seems to be the way to go. With only one or two night goblin units on the table, drawing out the fanatics is not as daunting as when your opponent's whole line is chalked full of them. I hate those damn fanatics. Skarsnik was leading the goblins, which also seems to be the way to go with a goblin army. His ability to delay opposing units forced a Saurus blocks, Salamanders and a unit of Skinks into reserve. The goblin magic was good, but not particularly overpowering - when Curse of the Bad Moon landed on one of my Saurus blocks, they had to roll toughness tests and not initiative, which saved their scaly asses. My opponent gave some of their new magic items a try as well. The Skull Wand didn't manage to kill a single model and the Bad Moon Banner didn't do anything since through a series of bad animosity rolls and the close deployment for the Blood & Glory scenario, the unit with the BSB ended up charging early in the game. Had the BSB not done so, the banner would have been much more effective. Like many others have said, unless use you run an all goblin army you're not likely to see this item on the board - I fight goblins all the time so I'll have to get used to it.
Labels:
Battle Report,
Lizardmen,
Orcs and Goblins,
Steggadon Project,
tactics
Tuesday, January 25, 2011
Battle Toads: Strange Advice about Slann Mage Priests
Friday, September 17, 2010
Eurika! Look at what I found

Wednesday, September 8, 2010
Thursday, August 19, 2010
First Game of 8th Edition
I ran my lizards in my first 8th edition WFB game last night at the FLGS. I didn't take notes or pictures, so this will be the hi-light reel version of the game. We had to cut the game sort and only go three turns - it was the first game of 8th for both players, so there was a lot of "um, wait, we should look that up..." Anyways, here's what I took:
Labels:
Battle Report,
Lizardmen
Sunday, August 15, 2010
Subscribe to:
Posts (Atom)